Thursday, December 28, 2006

It's all over until next year...


Are you exhausted too? Well now all that is left is the relaxing and the New Year celebrating! I hope everyone's holidays were peaceful, safe and full of fun. We had an excellent holiday. I got gifts to placate my 2 passions, cooking and knitting. And a few more things I can put candles in. I'm a big fan of candlelight during these long winter nights. I really learned to appreciate the beauty of the long winter night while spending many of them in Sweden. Everywhere there are tealights to twinkle in the dark. It's so peaceful. Funny I would find the darkness peaceful but I do. So here's to winter! We had a green Christmas day but now there is a nice little blanket of snow, another thing I find peaceful. And when the sun shines on the brilliant snow it really boosts the spirits. But I'll admit, it does look cold out there today. I think I'll stay in.... snuggle up with my knitting and maybe cook up a yummy dinner later!

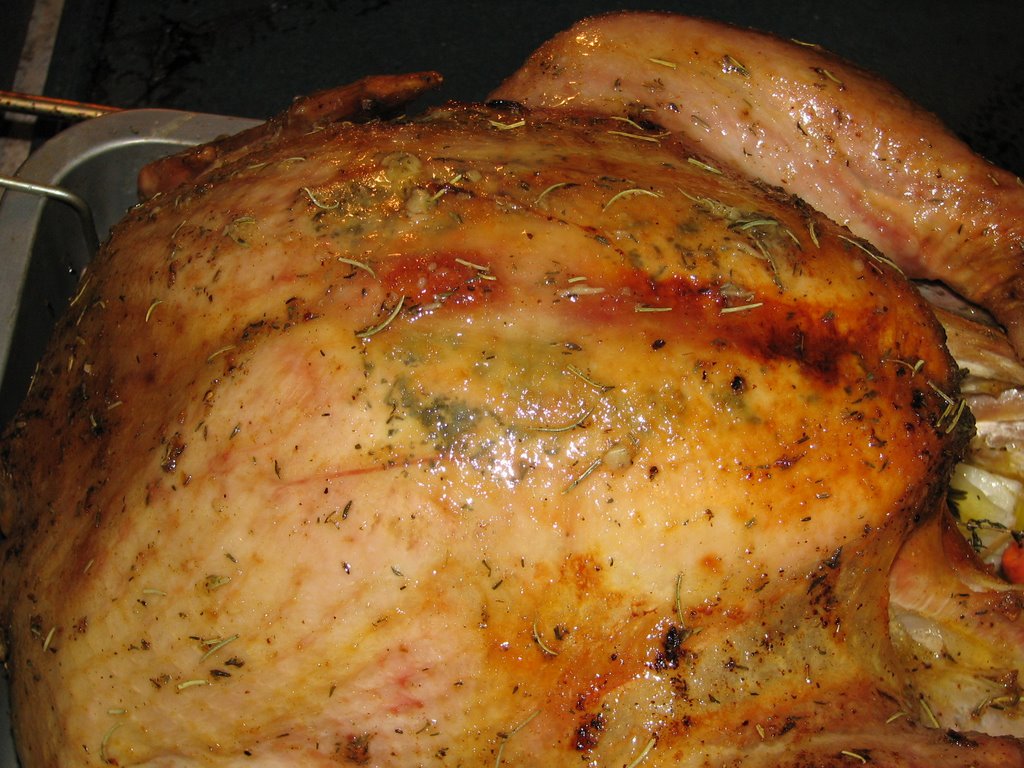
Just so you know that even us expert cooks screw up, I'll share my turkey story with you. Due to the hustle and bustle, I forgot to take the bird out to defrost. I remembered on Christmas Eve. And while I didn't have a huge bird this year (about 13 pounds, 5.7 kg) it still required some time to defrost. So I left it out on the counter, not in the fridge. Part of the reason I hadn't taken it out earlier was I had absolutely no fridge space. Nada, as in - no way was another thing fitting in my fridge! I kept feeling the bird to see how the defrosting was going. I'm extremely aware of the 4 hour, 4-40 rule. This is the rule where nothing should sit out between 4 and 40 degrees for more than 4 hours. I turned the bird upside down once one end had defrosted enough so that the cold water from the bird would drip down the defrosted part. Just a side note, we had a ham in the fridge in case the turkey became in any way, questionable. So I had a back up plan (just by luck really, we were to have the ham for Boxing Day dinner).

So I kept an eye on the turkey and once it was defrosted on the outside I took it out of the packaging. It was still a little frozen inside but I was able to wiggle out the neck and the giblets. There was only the heart. I put the neck and heart aside in the fridge and added them later to the pan right before it went in the over. I salted the bird and put it in the roasting pan with lots of foil. As I mentioned, there was no room in my fridge so mister bird had to spend the night outside. Last year I had a covered pan so all I did was put something heavy on top to keep out the critters and I think I taped the lid on. This year I was using an open pan so I had to put the pan in the bbq to keep it safe. All night I dreamt about my bird making a run for it. Luckily the temperature cooperated and stayed just around freezing. When I brought the bird in the next day it had some surface freezing but at least I knew it was safe from the temperature danger zone.

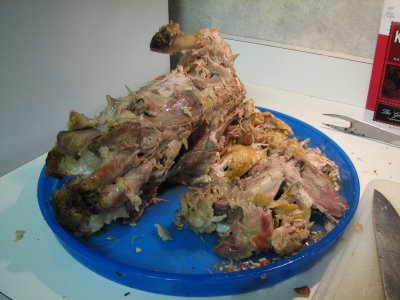
I didn't have a rack to put the bird on in the pan so after rinsing the salt off, I put the bird on some celery, carrots and onion. This natural rack also added great flavor to the pan drippings which were later used for the gravy. You can do this for any roast or bird. Since I had a lack of fridge space, once we finished with our main meal we cut up the rest of the bird and put it in freezer bags. Most of it ended up in the freezer but we kept some out for munching and leftovers.

Speaking of leftovers, here is an awesome leftover sandwich. Smear a little dijon and mayo on once slice of bread and layer on some turkey. On another slice of bread smear on some leftover cranberry sauce and then layer some sliced brie cheese. Heat both slices of bread in a 325 degree oven until the cheese melts (about 5 - 10 minutes). Take it out of the oven and put the 2 slices of bread together to make a sandwich. It's very tasty!

Tuesday, December 19, 2006

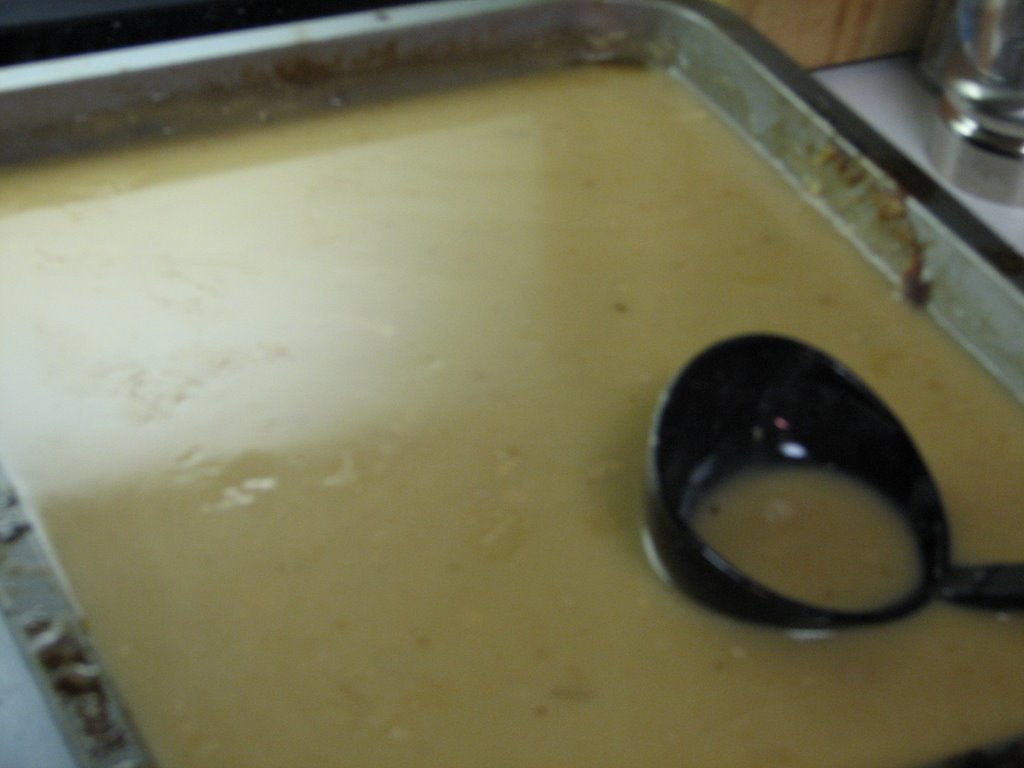
Turkey Tip #6 - Great Gravy

Now this recipe is about the gravy, not the turkey but without great gravy, how good can a turkey really be?! This is not terribly complicated and will give you great results.

Okay, you've removed the turkey from the roasting pan. Now you should have a lot of great turkey drippings on the bottom of the pan. You are going to put that pan on the stove top over medium heat. Add 1 cup of riesling wine (or you can use brandy, I like the wine better because it tastes more subtle) and 1 cup of either the homemade broth you made the night before or 1 cup of the store bought broth. Let this all simmer for about 20 minutes. You are looking for the liquid to reduce. You should be able to look at the side of the pan and see where the liquid line has shrunk down the side by about 1/3. While that is simmering, take another cup of broth and add about 1/2 cup of flour, mix it until smooth. A whisk or putting it all in a jar and shaking it works well. Just DO NOT USE HOT BROTH. You'll have an explosion. Happened once when I was a kid.... Not pretty.

Turn down your pan on the stove to med low. Mix in your flour/broth into the pan. This is when a whisk is essential. Otherwise get your kids to all get spoons going in the pan! Pour slowly and mix vigorously as you add the flour/broth mix. Keep stirring until it starts to bubble again. You'll see how it thickens up pretty quickly. If it doesn't thicken up, mix more flour with broth and add it in. Sometimes it takes a little more flour if you have a lot of liquid you are trying to thicken!


Where are those mashed potatoes!?

Christmas Morning Strata

My Aunt had just asked me for this recipe that I made the last time she visited. It's quick, it's easy, it can be made the night before and it's nutricious. So I thought I'd share it with everyone. It's a great way to start any day but it really was originally called "Christmas Morning Strata" so try it over the holidays. I don't have a pic but you don't need to know how it's suppose to look, you really can't screw it up. I promise!

1C broccoli florets
5C ½ inch French bread cubes
2C shredded cheddar
1C cooked ham, cubed
3 beaten eggs
1 3/4C milk
2 tbsp finely chopped onions
1 tsp dry mustard
Dash of pepper

Place broccoli and 1 tbsp water in a microwave dish, cover and cook for 2-3 minutes, drain
Layer half on the bread cubes in a greased 2 qt. casserole dish
Top with cheese, ham and broccoli
Top with remaining bread cubes
Mix eggs, milk, onion, mustard and pepper
Pour egg mixture over layers
At this point you can cover and chill for 24 hours
Uncover and bake at 325 for 1 hour or until a knife comes out clean
Let stand 5 minutes before serving.

Merry Christmas!!

Monday, December 18, 2006

Turkey Tip #5 - Resting the Bird

This is the single most important tip but it's the easiest one yet. You MUST let the turkey rest before you cut into it. I mentioned it before but it bears repeating, it's that important. Once you take the turkey out of the oven and confirm it is done but either jiggling the leg or testing the temp with a themometer, move it to a cutting board or serving tray. COVER IT TIGHTLY WITH FOIL. It will stay warm for quite a while so don't worry. Keep it this way for A MINIMUM OF 20 MINUTES or up to 45 minutes. This is the best way to prevent your turkey from drying out. All the juices redistribute through out the bird and stay moist. It's easy so do it.

I thought I'd provide a before and after shot!


Turkey Tip #4 - Easy Cornbread Stuffing

One week and it will all be over! Are you all ready? Don't panic. I'm still making gifts, the house isn't decorated or even clean yet and I do this as a living! By this time next week, it won't matter and all that will be left will be the relaxing, eating, drinking and spending time with family and friends. You know, the stuff that really matters! But before then, let's see if we can share a few more tips for a great Christmas dinner.

This is less about the turkey and more about the stuffing. I have posted my super easy cornbread stuffing before but it deserves a repeat. There are lots of fancy stuffing out there but this is simple and tastes delicious. As I mentioned earlier, I don't stuff mine in the bird, I cook it separately making it dressing, not stuffing. It just means the bird cooks a little quicker with less time to dry out. You can do it either way, it's up to you.

All I do for my cornbread stuffing is make some store bought packages of cornbread up ahead of time. I leave them uncovered on the counter to help them dry out a bit. If you can get store made cornbread or the cornbread bread cubes, go ahead. Just don't get the cornbread cubes already seasoned for stuffing. It will have tons of salt and it's better to season it yourself.

Break up the cornbread in a bowl. Toss in a finely chopped onion and some dried herbs. I use about 1 tbsp per package of cornbread mix or if you get the bag of cornbread cubes, use about 1/4 cup of dried herbs. You can use fresh herbs if you like but it isn't necessary. I use rosemary, thyme and sage or poultry seasoning. Melt some butter in the microwave. I usually start with about 2 tbsp. Add to the stuffing mix until you can get a bit to form a loss ball in your hand. Keep adding until you get this consistency.


I'll add the dish into the oven about an hour before the turkey is done. If I have to wait until the turkey is finished before putting the dish in the oven then I usually only need to cook it about 45 minutes if it's a big dish. Use a long flat pan like a lasagna dish if you are putting it in after, it will cook quicker. Remember to put some turkey drippings in the dish. I use my baster or a spoon and take some of the drippings out of the pan and drizzle them on the stuffing dish. Perfect.

Tuesday, December 05, 2006

Turkey Tip #3 - Preparing the Bird for the Oven and Cooking!

Lets talk about getting that bird ready to hit the heat. Many people still stuff their birds with stuffing. I stopped doing this a last year. One reason was the added length in cooking time required to get a stuffed bird cooked all the way through. This added time gives the white meat more opportunity to dry out. Definitely not a good thing. I was a little concerned as to how I would get the great turkey flavour into the stuffing, (which, when cooked outside the bird is called "dressing") but not to worry. I use my turkey baster to get the pan drippings out of the pan and onto the dressing either during the last hour of cooking if I am doing the dressing and the turkey in the oven at the same time or, if I have to do the dressing after the turkey because there simply isn't enough room for both, I siphon off some pan drippings when I take the turkey out and drizzle them over the dressing before it goes in the oven. I'll pass along my dressing recipe as a separate post.

Once you've rinsed off the salt coat from the night before, pat the turkey dry. Now it's time to get it ready for it's big day in the oven. I cut up some celery, onions, lemons and herbs to put inside both the body cavity and the neck cavity of the bird. The herbs I use are fresh thyme, rosemary and sage. If you don't have fresh use dried. You'll need dried in a minute anyway so if you want to save money and time, just buy dried. Cut the veggies into large 1 inch chunks. Before you stuff these goodies in the body cavity, check around the skin flaps and see if there are chunks of fat. If so, remove them. You will add your own moisture to the bird so you don't need these adding more grease to the mix.

Mix your dried herbs, thyme, rosemary, sage, summer savory, poultry seasoning, whatever, with a good amount of Olive Oil and a squeeze of lemon juice. I usually mix up about 1/2 cup of olive oil and a squeeze of half a lemon with about 2 tbsp of dried herbs. This is your basting mix. Spread it all over the turkey before it goes in the oven. You will use this to baste the bird every 20 to 30 minutes while cooking.

We have one more important step. Keeping the breast meat moist. The brining you did the night before will help but it won't be enough. Some people put cheesecloth over the breast meat at the beginning of cooking, some put bacon strips over the breast meat. I put butter mixed with herbs under the skin. Not a lot! For this 22 pound bird I used about 4 tablespoons. I have a 12.5 pound bird for Christmas dinner and I will only use 2 tablespoons for it. Mix the butter with the herbs and shove it under the skin. Make room between the skin and meat before you go in with the butter. It's easier if you have the space ready. This and basting will keep your meat moist!

And now - to the oven. I start mine at 425 for the first 30 minutes, uncovered. Then I baste, reduce the heat to 350 and tent foil over the bird. I cook it until the meat themometer says 180 degrees or until a leg gets loose. I usually do the leg method as I don't always have a themometer handy. Jiggle the leg, if it starts to give way from the body easily, it's done! And there should be no bloody juices coming from the bird. DO NOT CUT INTO THE BIRD!!!!!!!!!!!!!! The meat must rest for at least 20 minutes after you take it out of the oven otherwise you will open it up, let all the juices out and end up with a dry bird. Blah!

Wednesday, November 29, 2006

Turkey Tip #2 - Prep the Bird!

Here is my next turkey tip. How to prep the bird properly. DO THIS THE DAY BEFORE!! This is extremely important and can make the difference between a juicy bird and a dry bird. So here goes.

First, be sure to fully defrost your bird in the fridge. It takes about a day for every 5 pounds or 2 kilograms. I put our 22 pound turkey in the fridge on Sunday morning and Wednesday evening when I took it out to brine it (to be explained shortly), it was still frozen on the inside. Luckily it wasn't frozen solid so I was able to wiggle the neck, tail (also known around here as the pope's nose... my family is from Newfoundland, I can't explain it) and giblet packet out. It is imperative that you check the inside of the bird for these things. You don't want to cook the bird with these inside!!! My mom did this once. Yes we all have our turkey cooking horror stories.

You have some options as to what to do with the neck, tail and giblets. The liver should be separated from the group. It makes gravy or broth bitter. It looks just like a human liver, except much smaller, so it is easy to identify. Either cook the liver separately or toss it. The rest of the inside treasures can either be made into a broth that you will later use in the gravy or just tossed in the pan with the turkey to flavor the drippings. I support either choice! First let me explain brining and then I'll tell you about the broth. Both of these things should be done the night before.

There are 2 types of brining, wet and dry. I use the dry method simply because I do not have a container big enough to soak a big turkey in salt water overnight. And I find dry brining really simple so that is what I am going to focus on here. You can find lots of info about wet brining on the net, try the food network or Martha.

Dry brining is simple. After you empty out the giblets, give the bird a wash with cold water and pat dry, inside and out. Now take either some kosher salt (my preference) or regular table salt and coat the outside and sprinkle a lot on the inside in both the body cavity and the neck cavity. You want this bird well coated!

This is the bird the next day after a night of partying it up in its salt suit. Attractive, isn't it?!

Okay, on to the other step you should do the night before if you feel so inclined. The broth. The last 2 years I have made a broth out of the inside treasure collection, as opposed to just putting them in the pan with the turkey to add to the drippings flavour. It really is up to you. I'll share my whole turkey gravy recipe with you later. It is awesome, if I do say so myself!

In a pot, add some chopped onions, carrots and celery. This is the classic French flavour base known as mirepoix that is in all soup broths and stocks. Don't worry about the size or bother peeling the carrots, you are going to toss all this out after the broth is made. Add the inside treasure collection, except the LIVER to the pot. I also add a can of low sodium chicken broth. Add some herbs like thyme, rosemary and sage to the pot. Simmer gently until the pot reduces by about 1/3. Drain out everything but the liquid and ta da! You have broth! If you don't have time or energy, don't sweat it, just skip this step and use some can or box of broth tomorrow when you make gravy. It's the holidays! Relax, have a cocktail, chat with your guests. Don't stress yourself!

And about the sodium content. While I advocate strongly to reduce the salt in your diet, keep in mind that a turkey has no sodium to start with. The amount added by the salt brine in not huge and will result in less salting at the table by your dinner companions. And you will note, I didn't add any to the broth. I can add it later to taste when I make the gravy. After coming back from a week of eating out and a big turkey dinner, Tim's blood pressure is still fine. It's the big picture here, not one meal. But you'll see, I don't over do the salt during the rest of the turkey prep because it simple doesn't need it.

As always, if you have any questions, don't hesitate to ask!

Monday, November 27, 2006

Turkey Tip #1 - Buying the Right Size!!

I'm back from the Big Apple! It is always great to see the city as it prepares for the holiday season.

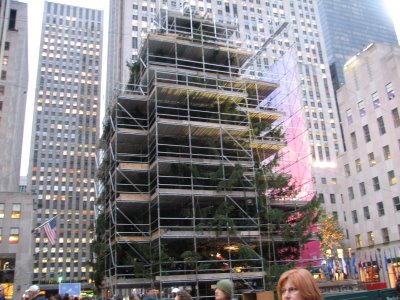
The official lighting of the tree in Rockefeller Center is this week! It's quite a sight to behold. Imagine, that tree was in someone's yard just a couple of weeks ago! It was discovered by helicopter. And for those of you concerned about the environment, it was getting old and would have soon fallen on it's own so the owners knew they were going to have to cut it down in the next year to avoid serious property damage. It's over 100 years old.

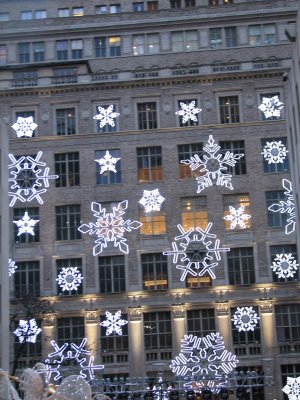
Saks was testing their lights for their official unveiling later that night. It's a beautiful display, don't you things?! And Cartier was not to be outdone by any of their neighbors.

Traveling around the holidays always puts me in the spirit. Even airports decorated for Christmas seem pleasant.

Okay, on to the bird. Thanksgiving dinner went well and I'll be sharing more tips, recipes and pics in the days to come. And then there will be recipes for the leftovers. So stay tuned. But today's tip is about size. Turkey's are one of the many things in life where size matters. Bigger isn't always better! I wrangled a 22 pound turkey for 7 people. It's kind of sad when the friends are gone but the leftovers linger... and linger... and linger. So what size bird should you buy? The rule is 2 pounds per person or just under 1 kilogram per person. This will leave you with leftovers but just enough for some sandwiches or a soup. If you want more leftovers, I wouldn't get more than 3 pounds per person or about 1.3 kilograms per person. Leftover turkey does freeze well and lots of recipes call for cooked turkey or chicken which make a great use for these leftovers. But be sure to wrap them up in serving sizes or meal sizes separately. One big block of turkey isn't going to do you much good when you only need a cup. And be sure to mark the freezer package with the name, amount (weight or size) and date. You'll be grateful when you are standing at your freezer door while juggling frozen packages as your fingers get frostbitten!

If you don't want leftovers, get about 1 1/2 pounds per person or about 6oo grams per person. If you aren't feeding a large crowd, consider a large chicken or just a turkey breast but be sure to follow my tips for keeping the meat moist (coming up in the next few days), even if you are cooking these smaller meals. I learned the hard way so you don't have to!

Thursday, November 16, 2006

Healthy Fried Chicken

I can chew! Whew! I've had a Caesar salad the last 2 evenings just because I could! I made up some of my low far creamy Caesar dressing (see below). The first night I sauteed a piece of Salmon to go with it and last night I added in some grilled chicken. I still have to let the croutons get a little soggy in the dressing but I don't mind. It's better than pureed!

Tomorrow we had south for the American Thanksgiving. This is the 8th year in a row I have made the trip to cook a bird for some displaced Canadians on one of the best holiday's of the year. It is the single most relaxing weekend of the year for me even though I cook the whole Thanksgiving day dinner. Last year was my best dinner ever. I made notes and saved the recipes I used for inspiration. So I'm looking to make a repeat. Expect a lot of tips for a great holiday dinner over the next couple of weeks. You'll be all set for Christmas!

Here is a recipe to try now. Sorry no picture but it was a hit with my folks who were in town when I served it.

Healthy Fried Chicken
4 Chicken breasts, thighs or legs with the bone in but the skin removed. (I cut the breasts in half because they are usually so large)
1 cup Buttermilk
1 egg
1 cup Flour
1/2 cup cornmeal
1 tbsp paprika
1 tbsp oregano
1 tsp cayenne
1 tsp cumin
Salt and pepper to taste
(experiment with your spice and herb mixtures, come up with your own special homemade fried chicken!)
2 tbsp canola or vegetable oil of your choice.

Preheat oven to 400
Heat a nonstick skillet over medium high heat with the 2 tbsp of oil.
Beat the egg and add it to the buttermilk in a shallow dish.
Combine the flour and cornmeal in another shallow dish.
Dip the chicken in the buttermilk mixture and then the flour mixture.
Cook in the pain until lightly browned on all sides.
Place in a baking sheet and cook in the oven about 20 minutes for breasts and about 30 mintues for legs and thighs. Remember to let it sit for about 10 minutes to let the juices redistribute and to prevent it from getting dried out the minute you cut into it. Take it off the pan and put it on a room temp dish. But don't cover it or you will lose the crispiness on the skin.

It's quite tasty! Simply place any leftover chicken on a plate in the fridge until cool, then cover and you'll keep the skin crispy.

Saturday, November 11, 2006

My Dinner Selections


Just thought I'd share a pic of my dining choices for today. The dish to the front left is a piece of donair pizza. Beside it is some perogies with sour cream and in the back is a chicken and spinach curry with mashed potatoes which was surprisingly good and easy for me to eat. Welcome to my world. Tomorrow I'm pureeing a steak. Wish me luck!

The Necessity of Chewing

As I mentioned I have had gum surgery lately. While it has put a damper on my cooking desires, my appetite is still good. Problem is that the thought of eating is exhausting. Everything must be pureed and then it takes forever to gnaw my way through a meal. Not really a meal, more like a snack. So by the time I'm done, I've managed to only get down half of a normal serving and then I'm hungry again in a couple of hours! When you can't chew and the roof of your mouth is covered in plastic (it would be so much worse to try and eat without the protection, the roof of my mouth is full of stitches...) it is impossible to taste anything. As I write this I am trying to gnaw on what would amount to one slice of donair pizza. When you can't chew you really want big taste. Tonight I'm going to make a curry chicken. Yes, it will be pureed but hopefully the big taste will come through. So to everyone out there who can chew... CHEERS! You don't know how good you've got it!

Friday, November 10, 2006

Pastelli's Restaurant Review

I'm sorry to say I haven't been blogging much lately. This week I had gum surgery so I haven't felt up to doing to much. And the only thing going on in my kitchen is the pureeing of food from my freezer. Once again I am grateful that I freeze lots of leftovers. I haven't been in the mood to cook but we still have lots of healthy options right in the freezer. It's hard to be inspired to cook when all you are going to do is puree the food and swallow it. I'll be glad when I can chew again! And all this is after Tim having his wisdom teeth removed a month ago and then he was on pureed food. Now he has an infection so we have matching swollen faces at the same time....

Before my surgery, we had gone to Pastalli's. I'm not sure how long the Italian restaurant has been open but it was one of the first restaurants I went to when I first moved to Moncton over 7 years ago. And not once in the past 7+ years have I left there disappointed!

This visit we had some special appetizers and wine pairings put on the menu in honour of the wine festival that occurs here in Moncton annually. There is nothing quite as interesting as the proper pairing of food and wine. I had a fresh mozzarella salad with a bold Italian red wine while Tim had a spinach and goat cheese wrap with a nice French Sauvignon Blanc. We were both pleased with our selections. Although mine had a balsamic glaze that was way too thick but it was delicious anyway.

Since I had ordered an appetizer, I opted for a lighter main course. I have a terrible habit of ordering too much food. I went with the Scampi alla Romano. Basically shrimp and pasta in a garlic sauce. There may have been too much garlic but since I love garlic, I enjoyed it. Tim had the lamb chops and they were cooked to perfection. I brought home my leftover pasta and it filled the fridge with a garlic smell. I enjoyed it every time I opened the fridge door. It didn't last past lunchtime the next day...

Even when I look at the small complaints I may have with a dish at Pastalli's, the overall experience makes me glad I spent my entertainment dollar there. Not everything you have when you go out may be exactly as you expect but when you can walk away from the experience with a general feeling of pleasure, then that is an evening well spent!

Sunday, October 29, 2006

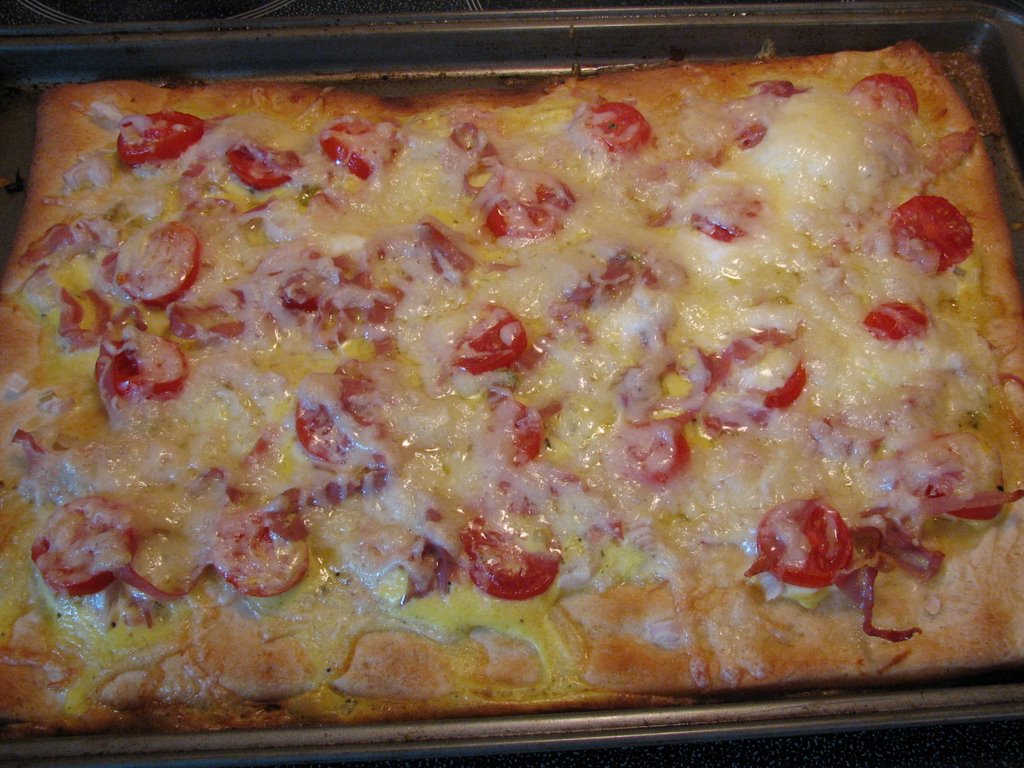
Breakfast Pizza

Yes, you heard right. Pizza for breakfast is a fantastic idea. I usually make it for Christmas morning, it taste that good. But it is easy enough for anytime and leftovers make a great quick breakfast meal when your on the run!

First use either the flatbread pizza crusts or the refridgerator dough. Pre-cook the dough as the package directs. You can use a thin layer of dijon mustard (about a tbsp) if you want or you can leave it out. The one I made this morning didn't have any dijon. Layer on your toppings such as, back bacon, proscuitto, bacon, ham, pancetta, smoked salmon, breakfast sausage, etc. And add some veggies, onions, mushrooms, peppers, tomatoes, broccoli, even spinach. Then drizzle on your eggs. You will need to bake this pizza on a cookie sheet or pizza pan... the eggs will often seep over the edge. Finally pick your cheese. I've used Oka, gruyere, swiss, cheddar, emmenthal. Bake until golden or follow the instructions for your crust.

This morning we had shallots, tomatoes, proscuitto, pancetta, eggs and gruyere. It was delish! And we have leftovers to grab tomorrow morning or for a snack later today.

Harvest Dinner


Last night was the first meeting of our dinner club. It was a nice evening. Very relaxing. And we weren't hungover this morning! I did the main course. I went with a stuffed roast beef, potato galettes, butternut squash ragout and chianti glazed beets.

Overall I was not impressed with my performance. The roast beef was more on the medium side then the rare side. I used my meat themometer but I still went a little too long. The potato galette was good. I made individual ones but I didn't fill up the dishes enough so when they cooked down the dish was only half full in the end. I filled them to the top but I should have gone over. A potato galette is simply some shallots sauteed in olive oil with some fresh chopped thyme tossed with some thinly sliced potatoes. I used my mandoline to make the potato slices. Layer it in a round dish with cheese between each layer. I used parmesan and gruyere. It's that simple! Bake it in the oven for 45 minutes or so until golden. It was my favorite part of the meal.

The butternut squash ragout had mushrooms (I used cremini) and brussel sprouts done in a white wine sauce. It was a weak sauce for such strong tasting veggies. The chianti glaze on the beets also was weak. I should have just oven roasted the beets and butternut squash, tossing them in balsamic vinegar and olive oil then about half way through, added in the brussel sprouts and mushrooms. Oven roasting veggies brings out the sweetness and is simple. Instead I had to try and get complicated and it didn't taste any better... One day I'll learn!

The next dinner club I will be doing the dessert. I don't usually make too much of a fuss about dessert which is why a dinner club is so much fun, you get to focus on your dish since you only have the one. I think I'm going to do a creme brulee. I have the torch and the right dishes. And I'll serve it with some Bailey's. We now have them in the different flavours and they will pair beautifully with a nice creme brulee!

Thursday, October 26, 2006

The Best Low Fat Caesar Salad Dressing Ever!

Here is my recipe for low fat Caesar salad dressing. It uses no fat!

Mix all of these in a blender, food processor or with an immersion blender (braun stick blender).

2 large cloves of ROASTED garlic (I bring home 3 heads at a time, roast them in a 350 oven for 45 mintues with the tops cut off and then seperate the cloves and freeze them in a ziplock bag, then I have roasted garlic whenever I want it!)
2 tbsp lemon juice
2 tbsp white wine vinegar (or balsamic, depends on your taste)
1/2 tsp worcestershire sauce
1/2 tsp anchovy paste (one tube lasts me a year)
2 tbsp grated parmesan (just throw in a 1 inch cube cut up a bit, the blender or processor will take care of the rest)
1/2 cup fat free plain yogurt
2 tbsp - 1/4 cup of low fat sour cream (if I have it on hand)

If I want to make it southwestern style and give it a little heat then I'll add a few shots of tabassco sauce.

I'll mix this with some mayo to make a sauce to put on salmon (it was serious delicious) and I add a shot of cayenne pepper just to make the heat stand up to the bold taste of the salmon.

I always make this a few hours ahead, if not a whole day ahead, so the flavours can really come together. I keep the leftovers in the fridge for about 5 days.

Monday, October 23, 2006

Baked Ziti

Feel like swimming in pasta and sauce?!

The last time we were in the US, we bought a box of ziti. They were on sale for $1 each! And there were a bunch of different shapes we never see around here. If you can't find ziti then penne also does beautifully in this dish but any medium shape will work.

This dish is deadly easy, freezes well and doubles up no problem. Just boil your pasta (the whole box or bag unless it's mumbo jumbo size) and drain. In a large bowl mix a large container of light ricotta (or low fat cottage cheese if that's all you can find), about 2 cups of grated mozza and about 1 cup of grated parmesan, romano or asiago. Add a jar of sauce. Mix it all up, stir in the pasta, pour it in a greased 8 x13 inch casserole or lasagna dish and your are ready to bake. I like to sprinkle another 1/2 or so of mozza on top. Bake at 350 for 35-45 minutes uncovered until is nice and bubbly. Let sit at least 5 minutes before serving.

You can easily up the veggie content of this meal. I used some leftover broccoli, fennel and yellow pepper. But if you don't have any leftover veggies laying around, try adding a box of defrosted frozen spinach or chopped broccoli.

You can prep this one the night before and just take it out of the fridge, pop it into the oven as soon as you turn it on. While the oven is preheating, the dish is coming up to temperature. You will most likely need to the full 45 minutes because of the time the dish had to warm up before cooking commenced. It's still all good!

Sunday, October 22, 2006

Thai Chicken Curry Crock Pot

I made a super-dee-duper dinner tonight. It's got a few ingredients you wouldn't expect but it makes a great dish.

In your crock pot mix the following:
1 cup of medium salsa
1/3 cup of peanut butter
2 tbsp of reduced sodium soya sauce
2 tbsp of honey or brown sugar
2 tbsp of orange juice
1 tbsp of minced ginger (I keep the bottled stuff on hand, much easier)

Toss in 12 chicken thighs and make sure they are coated. Cook on Low for 8 hours or hi for about 4-5 hours. I add in some veggies in the last hour. Tonight I used Cauliflower and peas but you can use diced carrots, snow peas, peppers, bean sprouts. It's a thai dish so think thai veggies. I served mine with rice noodles but you can use rice. You can also sprinkle on some green onions and/or chopped peanuts before serving but I always forget.

This recipe comes from the "Eat, Shrink and Be Merry" cookbook authors. They now run a regular article in Readers Digest with some excellent recipes. All healthy and I've never had one I didn't love. They also have 2 other cookbooks, "Looneyspoons" and "Crazy Plates". Pick any of them up if you see them, they are a must have for any cookbook collection!

Quick Chicken Skillet Dinner....and a cookbook recommendation.

Here is a super yummy quick dinner idea. I've been making this one for years and it still pleases my palatte.

1 tbsp oil or nonstick spray
400-500 grams or around 1 lbs of boneless chicken breast or thighs
3 large cloves of garlic, minced (I use the jar stuff, why easier!)
2 large onions, chopped
1 19 oz/540 ml can of stewed tomatoes
2 medium zucchini- sliced
1 red or green pepper, diced
1 tsp dried thyme
1/2 tsp dried rosemary (or you can use 1 1/2 tsp of italian seasoning in place of the thyme and rosemary)
1/2 cup of red wine (optional)

Heat a big frying pan over medium high heat with the oil or spray in it.
Brown the chicken then add the onions and garlic and saute for another 3 minutes.
Toss in everything else and bring to a boil. Cover and reduce heat to medium low.
Let simmer for 10 minutes, stirring occasionally.
Remove lid, add wine and let simmer until the liquid has reduced.

Serve over rice, pasta or even mashed potatoes. This is a variation on a recipe I got off the back of a can of stewed tomatoes. Excellent!

If you buy frozen chicken breasts in bulk, watch that they aren't already seasoned or be aware and don't salt them before cooking. Seasoned means "salted"!

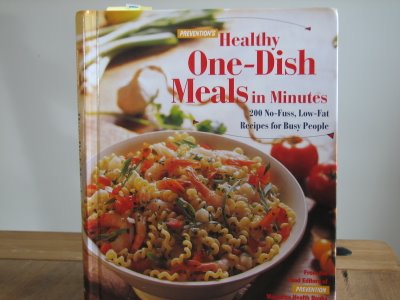
I'd like to make a recommendation for one of my favorite cookbooks. It can be hard to find but keep your eyes out in those second hand bins or discount bins. I had to buy my copy at amazon second hand. My mom has a copy and it is the greatest. Healthy and simple meals. I give it a "10"!! It's published by the people at Prevention and worth the effort to find.

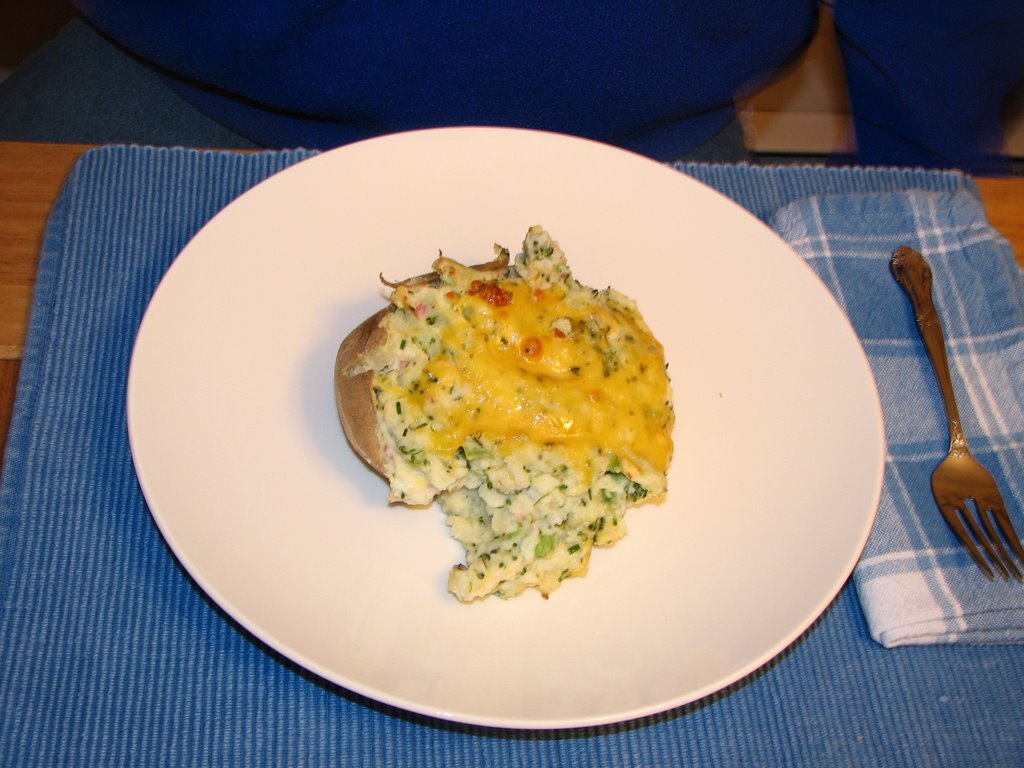
Stuffed Potatoes - as a meal!


Here is a seriously overlooked meal idea. The stuffed potato. It's low fat, nutritious,inexpensive and quick! I poke some holes in mine with a fork and then toss them in the microwave for 3 minutes per potato. I cook one potato per person. You can prep the stuffing mix while you wait for the potatoes. The stuffing mix is only limited by your imagination. I used broccoli, cheese, a little bacon, garlic and onion powder, sour cream and buttermilk. I also had some fresh chives so I chopped them up and added them in. I scooped out the inside of the potato and mixed it with everything else, scooped it back into the potato then cooked it in the oven for 20 minutes until the top was starting to brown at 375.

Add a salad and this is a great meal. Or use the potato as a side and bake a boneless chicken breast in the same oven as the potatoes!

Wednesday, October 18, 2006

Greek Pasta and Ground Meat

This meal takes about 30 minutes to prepare and another 25 in the oven but the great thing is that you can double the recipe and freeze half of it for another meal! It's originally a weight watchers recipe and is worth 6 points for anyone counting. It's a one dish meal. Everything you need for a balanced meal is in the one dish!

1/2 lb (approximately 230 grams) of pasta. The recipe calls for orzo but I used orzo and tubetti and I have a friend who uses rotini. So it's up to you, whatever you have on hand will do.
6 ounces of ground meat. This is why I doubled the recipe, it's hard to bring home just 6 ounces of meat...Usually its around a pound which is 16 ounces. The recipe calls for lamb which I had so I used it. My friend makes it with beef but you could use chicken or turkey or even pork. Any of them would work here.
1 onion, chopped
2 cloves of garlic, minced (I keep the bottled stuff on hand, it's a real time saver)
1/4 cup chopped fennel. Not everyone likes fennel or even knows what it is but this is a great recipe to get to know it but if you would rather use another veggie then I would recommend either 1/2 a package of frozen spinach or 2 cups of fresh spinach. Broccoli would also work well here. But those are just the ones I like, you'll have to come up with your own favorite substitutions.
1 tsp dried mint
1/2 tsp dried oregano
1 (14 oz) can of crushed tomatoes
3 tbsp of tomato paste. (I used 3/4 of a small can of tomato paste for a double recipe. You can freeze the rest of the can if you can't find tomato paste in the tube. The tube is so convenient, you can squirt out just the amount you need!)
1/2 tsp ground cinnamon
3 ounces light feta cheese, crumbled
2 tbsp grated parmesan cheese

Spray an 8 inch square baking dish with nonstick spray and preheat the oven to 350.

Cook Pasta as per directions on box. Drain and put in a large bowl.

Heat a skillet over medium-high heat. Brown and break up the ground meat. Add it to the bowl.

Add the onion, fennel, garlic, mint and oregano to the skillet and cook until the onion is soft, about 4 minutes. Add the tomato, tomato paste and cinnamon and cook until thickened, about 6 minutes.

Add the skillet mixture to the bowl. Toss in the feta and mix it all well. Pour it into the baking dish and sprinkle with the parmesan.

Bake for 25 minutes. Low fat, low sodium and delicious!

Want to take it to another level? Think about changing the herb/cheese/veggie combo to create other flavours. For example, Basil, oregano and thyme with fontina and provolone with zucchini and mushrooms would make a great Italian dish! It's only limited by your imagination.