Thursday, August 04, 2016

I've got what?? A chance to heal myself!

Once again I've been quiet for a while, over a year.  By the time I garden, knit, cook, work, take care of the dogs, oh and live, I just haven't had time to blog.  But now I have a new reason to share.  I've been diagnosed with Celiac disease. 

What is Celiac Disease?  It is an Autoimmune disorder where the body attacks itself, destroying the lining of the small intestine where all the important digestive activity happens, namely nutrient absorption.  But it is treatable!  Most autoimmune diseases are not. This autoimmune response is triggered by the ingestion of Gluten.  Gluten is found in wheat, barley and rye.  There are variations of these ingredients in all sorts of places so you have to know what all the names are.  It's ok, there's an app for that!  This disease is only treatable by eliminating gluten from the diet.  There are no other miracle treatments.  As little as 1/8 of a teaspoon can trigger the response.  That is barely the tip of your pinky.   Once the autoimmune response is triggered the small intestine is damaged.  It will continue to get damaged or not heal until all gluten is eliminated.  How long it takes to heal depends on the person, I've read anywhere from 6 months to 2 years and some people never completely heal.

Celiac Disease.  Well that's a hard one for a foodie who has just once again started traveling internationally for work to take.  I wasn't deathly sick.  Surely my doctor was mistaken.  She showed me the bloodwork results.  Then after the 4th time she told me I had Celiac Disease she looked at me and asked "how are you feeling today?" and that's when it sunk in.  The last couple of months I hadn't been well.  I had been functioning but barely.  I had made excuses as to why I wasn't feeling great.  I had a couple of bouts of "a stomach bug" and my gut hadn't fully recovered.  I wasn't eating enough fiber.  I wasn't getting enough sleep.  Too much wine.  Mostly I just didn’t have a lot of faith that the medical community would find anything if I complained.  I am biased after 5 years of trying to get a diagnosis for what ended up being Lactose Intolerance.  I had mentioned in passing these episodes of "stomach bug" to my doctor while at an appointment to follow up on my severely low B12 level.  I was more concerned about the B12 level than anything else.  Luckily my doctor ordered some extra tests with the bloodwork I was already having to check my B12 level.  Luckily.

I spent the first weekend going through the stages of grief while also telling myself it could be worse.  My neighbor was going through a battle with lung cancer.  She had been through radiation and chemo.  I just had to give up gluten.  I mean really, time to suck it up buttercup!  But it's still it plays with your mind, at least to start.  My body was attacking itself.  It was a chronic condition.  I could never have fried clams and chips (I eat those once every 5 years, if that).  I could never go out for Chinese food again (something I haven't done in years and actually, yes I can).  How was I going to safely travel?  Never mind having to give up great bread in France and Germany and all that wonderful beer in Germany.  How was going to eat at all while on the road?!  I was going to have to give up my job even though I had finally found a great company to work for and a role I really liked.  I kept reminding myself it could be worse.  It was hard to stay in that space.

Thankfully I'm a very solutions oriented person.  I see a problem and I say to myself, "what can I do here?".  So the research began.  Knowledge is power.  It's also comfort and strength.  I knew what the Celiac diet needed to be from working with Celiac clients in my former life.  I've been an avid food label reader for years.  I just needed to know the hidden sources to scour labels for.  Easy.  Step 1 competed.  App downloaded.  I got rid of the items in my house that contained gluten; soy sauce, Worcestershire sauce, etc. and replaced them with gluten free versions. I discovered I didn’t eat a lot of gluten during the week anyway.  Pasta once a week, the occasional wrap.  Easily replaced with gluten free or alternatives, quinoa instead of pasta, lettuce instead of flour wraps.  The weekends was when I was indulging in more gluten, breakfast sandwiches, toast which was why I felt worse on the weekends.  I see a breadmaker in my future!  But before I ran to the internet to order one, I'm still in the learning stage.  Let's see what further research reveals….

I can cook.  Anything I want I can make it myself.  I was doing that anyway.  I had been making my own salad dressing for a while simply because trying to keep a nice variety of bottled dressings was a challenge.  They always expired before I used them all!  A lot of things were already gluten free.  Even the snacks at work included a selection of gluten free items without anyone consciously buying gluten free. Cool Ranch Doritos are gluten free!  I had picked up some sausages in a can while in Germany before my diagnosis.  I can't find a decent translation of what kind of sausages they are but they have a gluten free label on them.  The foie gras pate I bought in France is also gluten free.  Ok this wasn’t going to be that hard….

I did a run through the Lindt store and I can't have the Lindt truffle balls (they have malt in them which comes from barley) but the bars were fine.  The Ghirardelli squares are also fine.  Apparently ingredients can change so labels must be read always.  Remember how I said as little as 1/8 of a teaspoon can trigger the autoimmune response?  Well cross contamination is a real thing.  Manufactured foods that share a line with gluten containing foods (like the Lindt truffle balls) need to be thoroughly cleaned or they run the risk of contaminating foods that otherwise wouldn’t have gluten.  A butter knife used to spread butter, peanut butter, jam on regular bread and then double dipped in the jar….. Nope.  Cutting board used to cut bread must go right in the dishwasher.  Surfaces must be clean.  Okay, again all this stuff is easy for me.  I did an advanced food safety course years ago.  I am all about avoiding cross contamination.  If you've ever seen me spatchcock a chicken, prep it for the oven and then clean down the area, you'd see really cross contamination avoidance in action! 

You might say, but really, 1/8 of a teaspoon, surely you would get that much from a cutting board?  The way I look at it is that there are always going to be minute bits missed but if I’m super careful about cross contamination risks then those little bits I'm missing won't exceed the 1/8 a teaspoon.  Plus they add up, a crumb here, a crumb there and boom trigger pulled!  I figure it is better to be vigilant for the stuff you do know and not think, oh it's only a smidge, it won't hurt because there is the risk there will be something hidden, missed or forgotten.

As I said, knowledge is power.  Well so is support.  I found an excellent resource called "The First Year: Celiac Disease and Living Gluten-Free" by Jules E. Dowler Shepard.  It's really helped.  I highly recommend it.  I've also reached out to the local Celiac Association and am waiting to hear back about becoming a member.  I've subscribed to Gluten-Free Living magazine and ordered a few cookbooks.  Even though I feel well equipped to deal with this diet, I am still going to ask my doctor for a referral to a dietician just to be sure I’m not missing an important supplement or hidden source, etc.  It's hard to sort through the fad diet stuff versus the real "eating with Celiac Disease" stuff.  A lot of the fad diet stuff is a little too over the top for me.  I don't need to give up dairy or become a vegan.  I've got enough to deal with the gluten, thank you very much.  This needs to be sustainable, for life, not some passing fad! 


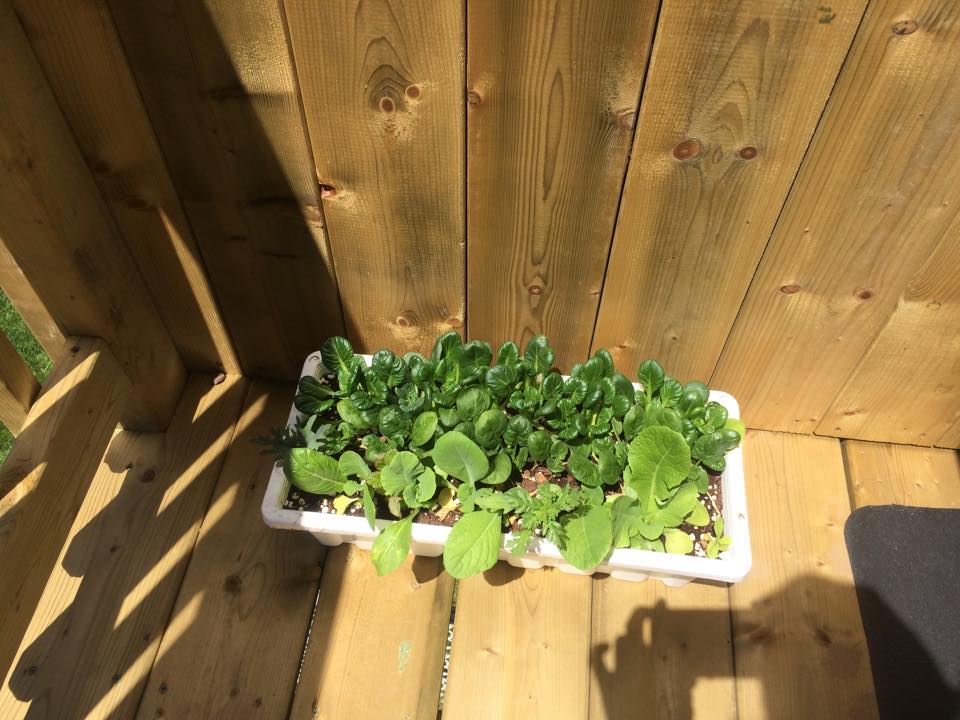
Today's lunch.  It's what I would normally have and it's gluten-free just by default!


Next week I'm attempting to bake and make my own granola.  Stay tuned!  

Tuesday, June 23, 2015

The green has arrived!

From this

To this!
With nothing but seed!  The dirt was hard and very clay-like.  Of course now I have grass popping up in all the places I don't want it but I guess you can't have it both ways...  

The garden is coming along slowly. However the containers of greens I started on the deck have already provided a steady supply of salads! 

Tomorrow's lunch consists of a pizza made on Naan bread with greens from the containers.  Tonight I made a Panzanella, an Italian bread salad using spinach from both my farm share (CSA) and my containers.  It was quite tasty.

I had some leftover sourdough kamut bread that I cut into cubes.  I sauteed some onions with one broken up sausage (I'd have used 2 slices of bacon if I didn't have sausage or if I had bacon on hand). Tossed in some onion and sprinkled on some olive oil.  Then I added the bread cubes and toasted them.  Right before I pulled it from the burner I added in the spinach to give it a little wilt.  I divided it between two plates and topped them with some diced pickled beets, 1/4 of a avocado diced (1/2 dived between the two plates) and some crumbled blue cheese.  I cheated and used bottled balsamic vinaigrette but I really should have made my own.  Less sugar that way.

Panzanella for 2:
1 sausage, casing removed and crumbled
1/2 of a large onion, diced
2 cups diced bread
4 cups spinach
2-3 pickled beets, diced
1/2 avocado, diced
2 tbsp crumbled blue cheese.
dressing of your choice.  


Easy peasy! 

An eggplant flower.  Even if I don't get a single eggplant, the flowers are really nice!

Sunday, May 24, 2015

My Coffin Bed and Wheatberries

So this weekend this happened:


I opened my last bottle of homemade red.  Yup, you are reading the label right, it's from 2013.  And it's finally really good.  And that was the last bottle.  

I finally finished my raised bed that resembles a coffin.  I took down 2 layers of boards cause I was getting damn tired of dragging wheelbarrow after wheelbarrow of dirt down to the back yard.  I did still manage to blow my Fitbit's daily expectations out of the water even with the reduction in workload (it was still a lot of work, tomorrow I expect to moan a lot).


Here's whats going on in my coffin bed.  Under the cloches are zucchini, eggplant, peas and peppers, two seedlings of each.  The tomato has the red plastic under it.  Supposedly the red under the tomato plant helps it grow.  It was too big to fit under the cloches so I'm really hoping the red mulch plastic works because I don't think it's really warm enough for the poor tomato plant.  Under the floating row is carrot, kohlrabi, kale and swiss chard seeds.  Mixed in all over the bed are onions, green onion (scallion) seeds and marigolds.  They are all suppose to help with managing pests.  I put a layer of newspaper fairly low in the bed and mixed coffee grinds in low and at the very top of the bed.  My soil is a mix of peat, compost and manure.  After I got everything in I remembered I had some sage I wanted to put in so it ended up in an odd spot.  Nothing is terribly neat or organized.  It's more higgledy piggledy.  I tried to leave space to sow more seeds over the summer for on-going harvest.  We'll see how that works out....

I prepped supper before heading out to the garden, knowing that I'd be too tired to do much after.  I deboned a very large chicken breast and stuffed it with sauteed spinach, garlic and feta.  I also cooked up some wheatberries.  They take an hour!  It worked out perfect as I let them simmer away while I enjoyed my morning coffee and brunch.  

I tossed the wheatberries with fresh basil, oregano and chives.  I toasted some pumpkin seeds.  Right before serving I add the pumpkin seeds and some feta.  That's it.  Simple and delicious.  It was a heavenly meal, well earned after a hard day in the garden.


Monday, May 18, 2015

A Jacob's Cattle Bean is Not a Chickpea

I made some veggie burgers with Jacob's Cattle Beans and some turnip tops (greens) in the food processor.  I added lots of herbs and spices.  I went for an Indian vibe.  It missed.  Tasted like cardboard.  Turns out you can't just swap out chickpeas and substitute Jacob's Cattle Bean.  In my defense, I was trying to use the local beans I had gotten in my farm share.

On the other hand, Jacob's Cattle Beans make awesome baked beans!

Everything has it's place.

Sunday, May 17, 2015

Garden Update

Last Saturday I built my raised bed.  I did it mostly by myself.  Rulers?  They're for wimps!  My neighbor helped me force the 10 inch difference in sides into a lovely box.
My cousin thought it might be my mother's next home...  I didn't mean to make it look like a coffin.  I may take a layer or two off.  I just don't want Ollie to think its a giant dog bed.  Or be able to pee in it.  He has very long legs.  Another shot to give some perspective.
I learned a valuable lesson this week.  Instead of digging holes for the posts, it's better to sledgehammer them in.  It really does work and I just so happen to own my very own sledgehammer. Doesn't every girl?

I also added some more crushed stone to even out the patio.  My Fitbit was overjoyed by the end of the day.  I think I may experience a higher level of exhaustion based on what my Fitbit says I've done during the day.  It's the power of suggestion.  Sunday was rest day...

I'll place patio stones on them later this year or early next spring but for now it tidied up the space. I'm actually quite fond of the stone and it gives more "de-muddifying" space for the dogs to drop some of the dirt and mud before they get to the back door.

Not a lot more got done in the garden (or on the treadmill for that matter) this week due to Ollie.  He strolled a little too closely to death's door this week.  I can speak flippantly about it now but last Monday night I thought he was gone.  I was worried he had an abdominal tumour that was bleeding out.  It's called Hemagiosarcoma and I've lost 2 dogs to it.  He was ok and then he was in complete distress. Thankfully it was only an obstruction in his stomach that his own digestive juices eventually resolved.  So another lesson learned this past week - just because it says it's "dog bones" doesn't mean it really is suitable for dogs to eat.


Ollie will be 11 in July.  Old age is not his challenge... I am.  Bad mummy.  I'll stick to treats I know and trust from now on.

I finally have some eggplant seedlings!  And my Zucchini are coming along nicely.
Although I went to the market this weekend and the seedlings there put mine to shame.

I don't have a lot of space or warmth to get a lot of seedlings going so I had planned to supplement my garden with plants from other farmers/garden shops.  I did buy mostly seed that could be directly sown.  Those should be in the garden now but the seedlings can't go out until after May 24th due to frost threats.  So I'm only half as behind as I think I am.

I should have done more yesterday but it was so gorgeous I just wanted to sit on my deck after morning errands.  I did get my wall done.
Once the threat of frost passes, I'll put some herbs and flowers in these handing planters.  The bag on the bottom right is actually a planter too.  Tomatoes will soon call it home.  I'm going to grow tomatoes in 3 different spots around the yard to see if I can find the spot they'll do best.  Your yard is a micro-climate, you have to learn to understand it and embrace it!

Last night I had the first burgers of the grilling season.  There is nothing so wonderful as the smell of meat on the barbecue!  I stuffed cheddar cheese in the middle and served them with my mom's homemade zucchini relish (I promise I'll share the recipe when zucchini is overflowing in the garden and market).  I also did a tomato salad.  The greens from the farm have been scarce so I'm trying to compromise until I can get local greens.  I bought a huge pack of greenhouse cherry tomatoes, tossed them with some feta, olive oil, dried mint, dried oregano and a splash of balsamic vinegar.  My buckwheat greens (see last post) went in as well.  It was a nice little salad!

Thursday, May 07, 2015

The Land of Dirt


Let’s look at the current situation in my yard/garden.


I’m hesitant to call it a “garden” as it’s barely more than a bit of dirt and some big dreams at this point.  But my speciality is difficult relationships so I’m optimistic I can make my dream to have a meaningful relationship with mother earth a reality. 

On a positive note, all my seeds have sprouted.  I’m even trying my hand at growing buckwheat greens.  You soak them for 12 hours like sprout seeds because, well they are sprout seeds…  Then you drain them for 12 hours in a sprout bag, jar or tray.  After that you put them in a tray of 1inch dirt and cover them for 3 days, keeping them moist.  I used an egg carton.  Then you take the lid off, water them daily and keep them in shade or indirect sunlight (which I’m pretty sure is just another word for “shade”).  After 7-10 days they are ready for eating.  I’m hoping to use them in sandwiches or on salads, soups or casseroles.  Gotta get your greens!


 All my lovely seedlings.


I’m struggling with my eggplant seeds.  I’ve reseeded them since the first batch didn’t spout.  I just don’t think it’s been warm enough for them.  It’s warmed up quite a bit now so I’m hopeful.  If these seeds don’t take I’ll try them directly sown in the garden under cloches.  I’m also planning on using the cloches for my zucchini and tomatoes.  The first batch of peas are already in their happy home with their cloche. 


I’ve got some nice greens coming up.  I’ll eat these as baby greens.  It will soon be time to thin these lines out. 


Due to the late melting of the snow and ice, produce from the farm is slow to come this year.  They couldn’t get to their greenhouses until the last week or so, never mind the actual garden plots.  This week we are getting fingerling potatoes, parsnips, carrots and a bag of sprouts.  That’s it.  Thankfully I had wilted and froze kale, stinging nettles, turnip tops, sugar snap peas and broccoli last season when each veggie was abundant.  I’m thinking roasted fingerlings with a beer can chicken and some greens from my freezer for Sunday when it’s supposed to be 22C.  (This translates to somewhere between 26C and 29C on my deck depending on the breeze.)  Maybe some Carrot Ginger soup for a night during the week.  And some lovely grilled pork chops with parsnip, potato, onion and greens in a British inspired Bubble and Squeak. 

We had some sweet potato and spinach from the farm last week so I made sweet potato and spinach gnocchi.  I’ll have some of those frozen leftovers with some of the frozen tomatoes the farm has sent us in previous weeks.  I’ve said it many times before but it’s worth repeating, thank goodness for my freezer!  I also have bottled beets, not pickled, that roast up really nicely when tossed with olive oil and a splash of balsamic in a 400F oven for 30 minutes. 

Sunday, April 19, 2015

Everything is better with BACON!

So I'm still suffering from CSA box bareness.  The box is pretty empty this week but I did get some turnip.  I love turnip.  Even if you don't, everything is better with bacon....

I cooked my lovely dish with a side of roasted rabbit.  Rabbit is fairly common in our meat share.  I was a bit skeptical to begin with but if Jacques Pepin cooks it, it must be good.  And it is!  If rabbit doesn't  float your boat or you can't find any, chicken legs would work great here.  Let's make this into dinner!

Roast Rabbit Legs with Mustard Maple Tarragon

Preheat the oven to 350F
Mix together the following:
  • Dijon Mustard
  • Maple Syrup
  • Dried Tarragon
Sear the rabbit legs in an oven proof pan (cast iron works great!). Turn them over and smear the mustard mix over them.  Pop the pan in the oven and cook until a meat thermometer reaches 160F.  About and hour or so depending on the size of your legs.

Turnip and Bacon with Mushrooms and Greens
Ingredients:
  • 1 large turnip or 2 small (smaller are easier to cut)
  • 2 slices of thick bacon, use more if your bacon is thin
  • 1 medium onion
  • 6 - 8 mushrooms, I used cremini
  • 2 -3 handfuls of greens, I used spinach
  • a little salt and pepper to taste

Instructions:
  1. While the rabbit cooks, peel and cut the turnip into 1/2 inch chunk.  Get the turnip in a pot, cover with water and bring to a boil.  Cook until just tender with a fork, about 15 minutes.
  2. Dice the bacon into 1/4 inch chunks
  3. Put the bacon in a deep saucepan with 1 -2 inch sides and a cover.  But don't cover it yet!
  4. Saute the bacon until it's almost crisp
  5. Add in the onions and cook until tender and translucent
  6. Add in the mushrooms and cook until soft.
  7. Once the turnip is tender, drain it and add to the pan with the bacon mix
  8. Cover and turn to low until almost ready to serve.
  9. Right before serving toss in the spinach and cook until wilted.


If you like you can deglaze the pan the rabbit cooked in with some white wine and cream and toss it into the turnip mix.  Yum!

A pan of sauce and a pan of turnip!


The finished dish.


Wednesday, April 15, 2015

I eat, therefore I garden. (and make Roasted Cabbage!)

I love my CSA but this time of year the CSA box can be kinda bare.  Hold on.  Do you know what a CSA is? I realized in my last post I didn’t explain so let me take the time to do so now.  It’s formally known as Community Shares Agriculture or a farm share.  Instead of the farm having to rely on commercial/corporate methods to get its products to market, it sells directly to the consumer.  What makes the CSA different than going to a farmers market is that we consumers commit to buying from the farm.  We buy a share in the farm!  We get a weekly delivery of whatever the farm is producing for a set price, no matter what happens.  There is risk in that if the farm has a bad year then so do you.  The extra plus is that because we “own” shares in the farm we are welcome to visit and even work on the farm if we like. 

My shares are with Taproots which is in the beautiful Annapolis Valley here in Nova Scotia Canada and they are in the process of becoming totally organic certified.  They have a couple of different farm shares you can participate in, a veggie share, fruit share, meat share, egg share and flower share.  The veggie and fruit shares come in two sizes, one smaller for 1-2 people and one larger for 4-5 people.  The flower share only runs for 10 weeks in the summer but helps the farm ensure biodiversity.  And they’re pretty! 

For the last 2 years I’ve had a small veggie, small fruit and meat share.  This year, since I have a freezer full of fruit, I’m getting a small veggie, meat, egg and flower share.  They also do a “Full Monty” which is everything the farm produces.  I may have to consider that next year but I’m worried it will be too much veg and fruit.  As I mentioned last post, I’m also looking to do some growing myself this year.  I’ll never be able to grow enough to replace my CSA which is not my objective anyway.  I love the idea of knowing where my food comes from but also watching to grow.  My CSA combined with my garden will do just that!

My criteria for garden planning was to pick plants that I don’t get enough of in my CSA, should mostly do well in containers and be hardy for my damp cool climate.  The seeds needed to be direct sow since I lack the space to properly start seedlings indoors.  I am also looking to overwinter and/or cold frame garden into the winter (preferably right through it but I’m not delusional).  I’ve got some non-GMO seed, mostly certified organic to grow mustard greens, spinach, lettuces, swiss chard, peas, zucchini, eggplant, runner beans, kohlrabi and herbs of all sorts.  I’m in the process of getting my deck rebuilt and extended, same for the patio below it as I mentioned in my last post.  But get this… the contractor figures he’ll be done in 2 weeks!  That’s before planting season really begins!!  And the contractor saved whatever wood was salvageable for planters and raised bed.  Reuse!

Current state of my back yard.  The dogs love it...
 
My CSA box was pretty small this week but I did make a great recipe from something in it that I wanted to share.  Cheap, cheap, cheap and easy!  Roasted Cabbage.  This is not your mother’s cabbage.  It can be quite tasty when not boiled to death.  And a great local green in the dead of winter…

Roasted Cabbage.
Ingredients:
·         ½ a large cabbage, sliced in ½ in slices
·         Olive oil, to coat pan and toss with cabbage
·         1-2 tsp dried thyme
·         A smidge of salt and pepper
·         2 cups of grated cheddar or any cheese of your liking.  I used part cheddar and part Monterey jack.

Instructions:
 
1.       Preheat oven to 350F
2.       Grease a 9X13 in pan, a lasagna pan
3.       Toss sliced cabbage with olive oil, thyme, salt and pepper
4.       Layer in the pan
5.       Cook for 30 minutes, stirring every 10 minutes
6.       Sprinkle with the cheese and cook another 5-7 minutes until the cheese is melted.


Wednesday, April 08, 2015

Back from my sabbatical

Ok, I wasn't really on sabbatical.  I can't believe it's been over 2 years since I posted last.  My joy for cooking hasn't waned, I just didn't need to talk about it.  I've been busy, working and living and enjoying a weekly CSA delivery.  But more about that in a minute. 

I needed to take some time to redefine my relationship with food.  I've always had a love of cooking going way back to being a latchkey kid who watched Jacques and Julia after school.  And I always had a love of healthy eating.  But somewhere along the way I went off in a whole gourmet, overindulging, overdoing it direction.  I got bored in life so I focused on the fun and joy in the kitchen.  About 2 years ago I got back the joy in my life so food no longer needed to provide me with that level of fulfillment.  Oh don't get my wrong, I can still whip up a gourmet meal.  They just tend to be lighter and simpler.  I still love to cook and eat well but my focus has changed.  It's back to healthy first and foremost.  We're talking about fueling the human body after all!

Now about that CSA.  It  has changed my relationship with my food supply.  Once you've experienced local, in-season food, year round, you'll never look back!  I am thrilled to see the local farmers markets becoming more and more popular even if in the dead of winter the local produce is scarce.  But it's hard to have local produce year round in this climate (it's cold people. very cold.  and snowy. lots of snow) so I have to supplement a bit at the grocery store and I did freeze a lot this past summer.  I have kale, turnip greens, stinging nettles all cooked and frozen, ready to pop into dishes.  I also get meat in my CSA.  Local, pasture raised, animals that I can go see anytime I want, the farm encourages it's members to stop by anytime.  And I have.  I've met the pork we're eating.  This year's CSA, which starts this week, we're also getting eggs.  Happy hen eggs!  We go through a lot of eggs in our house, always keeping a couple of boiled eggs in the fridge for quick, healthy snacks. 

Ok, I'm going to come clean.... This past weekend I went to boil 4 eggs, my usual Sunday morning chore.  I put them in the pot and put the pot on the stove.  I always listen carefully because to make the perfect hard boiled egg you should put the eggs and water in the pot, covering the eggs, put the lid on the pot, bring it to a boil and remove it from the burner, set the timer for 15 minutes while letting it sit.  Once your timer dings rinse them in cold water.  Tada!  Perfectly hard boiled eggs.  But you need to pull them off the burner as soon as they start to boil.  This is what you must listen for.  Well this weekend I heard a pop.  Did you notice the 3rd line above?  I put them in the pot and put the pot on the stove.... I forgot the water.  So when you put eggs in the pot with no water they pop and ooze out into the hot pot, cooking right onto said pot.  It was a lovely mess. 

In keeping with my love of local, I've developed a strong desire to grow more of my own.  I've always loved to garden but I really bought the yard for the dogs.  I've been watching British Cook and Author Nigel Slater as he his visits to his own garden and also local allotments (why don't we do more of these in Canada??).  I'm inspired by how much one can grow in small spaces.  So this year I'm going to garden around the dogs.  Containers, around deck posts, along the side of my house that's outside the dog yard....  I'm also getting my deck and patio rebuilt and my yard graded so I'm going to be dealing with delays to getting my garden set up.  I'm hoping to garden well into the winter.  Hoping.  We'll see! 

My seed order arrived just before Easter.  However the weather is not the slightest bit interested in cooperating....
Not a great picture but you get the idea of what my backyard is like at the moment.
How Canadian kids hang out.

It also snowed yesterday.  April 7th.  I can't even talk about it.  But once I get things growing under that snow in cold frames all that snow won't bother me one bit!

Sunday, March 24, 2013

Simple Cream Sauce (without the cream!!)

I've been eating some quick recipes out of my repertoire these days or out of my freeze with my homemade leftovers as we work our way through Emily's chemo (see her blog, Her Lovely Lady Lumps )  At the moment she's doing great so I shook my pots and pans and made a little brunch. 

This is a simplified version of sauce I've made before.  It goes best on poached eggs, veggies or chicken.

Cream Sauce without the Cream. 
Serves 2

Ingredients:
  • 1/3 cup plain yogurt
  • 2 tsp Dijon mustard
  • 1 tbsp butter
  • 1/2 tbsp chopped chives

Instructions:
  1. Mix all the ingredients together in a microwave safe bowl
  2. Microwave for 30 minutes, whisk, repeat until the butter is melted and the sauce is warm

That's it.  I use the chive butter that I have in my freezer.  I have large patches of chives in my garden so I make lots of chive butter to have during the winter months.  It's also way easier to grab as I'm cooking then to run out to the yard in the middle of food prep!

Monday, February 18, 2013

Special Day Crepes

This past weekend I made a special meal to honour Valentine's day and got reminded how wonderful crepes are.  They are so easy to make and remind me of winters in France or Switzerland.  Not that I've spent winters in France or Switzerland, although I have spent time in Quebec and in Moncton which has a great french vibe... and an awesome crepe restaurant Cafe Archibald! 

You can make a bit batch of crepes, freeze them and then pull them out to stuff whatever you feel like for a quick but elegant meal. 

Crepes
Ingredients:
  • 1 cup flour
  • 2 eggs
  • 3/4 cup milk
  • 1/2 -3/4 cup water (add less first, you can always add more)
  • 3 tbsp melted butter
  • more butter for coating the pan

Instructions:
  1. Blend it all in the blender! It makes it so easy, you can pour the batter right out from the blender into the pan.  The batter should be thinner than pancake batter.
  2. Heat a non-stick pan over medium high heat.
  3. Melt a little butter, about 1/4 tsp in the pan.
  4. Pour enough to coat the bottom of the pan.  Don't worry, as Julia Child used to say 'when making crepes you throw the first one out' because that's your time to get the batter right and get used to handling the pan.
  5. Swirl the pan to move the batter to completely cover the bottom of the pan.
  6. If you need to add more water to the batter feel free. The batter should move pretty easily over the bottom of the pan before it cooks. 
  7. Continue until you use all the batter, piling them up on a plate in the oven if you are going to use them right away to keep them warm or spread them out a bit on a cutting board if you are going to store them for later.

It might take a couple of tries but once you get your crepe making groove on it'll be easy peasy lemon squeezie!
Ready for the freezer for another meal later!  I only got 7 crepes out of this batch but usually I get 10 or more.  It depends on how big your pan is.  I used my largest pan and then remembered I usually use my smaller one.

I made a little sauce to pour over our filling.  It was soo good and sooo simple.  And there's leftovers of the sauce too.  I'm thinking spinach and shrimp crepes later.

Havarti Cheese Sauce
Ingredients:
  • 2 1/2 tbsp butter
  • 2 1/2 tbsp flour
  • 1/2 cup white wine
  • 1 cup chicken broth
  • 1 1/2 cup shredded Havarti cheese, Gruyere or Emmenthal would work too
  • 1/2 cup light cream
  • 1 tbsp butter
  • 1 tbsp chopped chives (I have butter mixed with chives frozen in a log in my freezer, I just cut off a piece to finish off the sauce.  ps. the chives came from my garden!)

Instructions:
  1. Melt butter in a saucepan over medium high heat
  2. Add the flour and whisk, heat until just starting to turn brown, about 30 seconds to 1 minute
  3. Slowly pour in the wine then the chicken broth, whisking continually. 
  4. Blend until heated and bubbly. 
  5. Add the cheese a bit at a time, whisk until melted, continue until you've got all the cheese in.
  6. Whisk and let bubble for a minute.
  7. Add in the cream, butter and chives, whisk until blended and heated through. 

I served this with some ham and asparagus.  They were so decadent!

Tuesday, January 22, 2013

Simple Sides

Wow, it's been over 2 months since I shared a recipe. Funny I haven't stopped cooking... I just made the Moroccan Chicken, Turnip and Carrot Tagine right off this very blog.  Mom actually picked up her plate and drank the remaining sauce.  It wasn't pretty but did prove how tasty this did was.  This reminded me of a dish Mom raved about over the holidays that I really must share.  Over the holidays we went to cottage in the woods, on a lake.  It was gorgeous and I wanted to spend my time relaxing, hanging with the dogs and not in the kitchen so I made simple dishes.  I cooked a ham, a pork tenderloin, roasted a prime rib, steamed some mussels but the sides, oh the sides did sing.  And I made them ahead!  Easy peasy.  This first one freezes beautifully.  It's a real treat to have veggie sides ready to go.  So here goes.

Sweet Potato Pancakes
Makes 8 - 10 pancakes

Ingredients:
  • 1/2 cup flour
  • 2 tsp sugar
  • 2 tsp curry powder
  • 1 tsp cumin
  • 1 tsp brown sugar
  • 1 tsp baking powder
  • 1/2 tsp cayenne powder
  • salt and pepper to taste
  • 2 large eggs, beaten
  • 1/2 cup milk
  • 1 lb sweet potaotes, peeled and shredded
  • 3 tbsp veg oil

Instructions:
  1. Mix everything from flour to the salt and pepper. 
  2. Stir in the eggs and enough of the milk to make it moist, toss in the sweet potatoes and add more milk if necessary to make a nice stiff batter.  Don't worry, you really can't screw it up. 
  3. Heat the oil in a saucepan over medium-high until hot.
  4. Drop 1/4 cup of the sweet potato mix and flatten with a spatula.  Repeat until the pan is full but NOT crowded.
  5. Cook 5 - 8 minutes until golden, flip and repeat on the other side.
  6. Place cooked pancakes on a paper towel lined plate and cook the rest of the mixture. 
  7. Serve with yogurt or
  8. Cool completely before freezing.
  9. Reheat by placing on a single layer on a baking sheet in a preheated 325F oven for 10 minutes or until hot through.

**If you wish to bake these you can.  Do it on parchement paper and at 425 for 10 minutes, flip and cook another 5 - 10 minutes. 


Here's another make ahead that actually does freeze well.  I like to reheat it in the oven.

Mustard Tatties
Serves, well that depends on how many tatties you peel...

Ingredients:
  • 2 potatoes per person plus 1 extra for the pot (seriously, this is how I learned to plan enough mashed potatoes)
  • Mayo
  • Mustard
  • Sugar.
  • Salt and Pepper to taste

Instructions:
  1. Peel the potatoes and place in a pot.  Fill with an inch of water.  You want to steam the potatoes more than boil them.  You can use a steamer if you like.
  2. Cook the potatoes until they are tender when poked with a fork.
  3. Drain the potatoes and let cool a bit, about 10 minutes
  4. Mash the potatoes
  5. Add equal parts mustard and mayo to start.  I usually start with 1//4 cup of each if I'm making potatoes for 2.  Taste.  Add more mustard and/or mustard as you like.  Add a tsp or 2 of sugar to balance the mustard.  Taste.  Add salt and pepper if necessary.  Taste.  Are you getting my point?  It's all about your taste. 
  6. Once you've got it to your liking you can serve it warm or cold (Newfoundlanders have this as part of a "Cold Plate" for all sort of functions all year long!)
  7. You can also freeze this but if you do you really have to serve it warm after the it's defrosted.  Just heat it in a baking dish at 325F for about 30 minutes until heated through.  It's quite nice.

Saturday, November 03, 2012

Harvest Autumn Chili

I've been holding on to this recipe from the September 2007 edition of Chatelaine.  It was the inspiration for this dish.  Seriously worth the wait.  Totally hit the spot on this chilly fall Saturday that was spent watching college football all day long (yup, I'm grinning from ear to ear - perfect day!!).


Harvest Autumn Chili
Serves 4 - 6

Ingredients:
  • 1 tbsp vegetable oil
  • 1 lb pork sirloin, cut into 1 inch chunks (2cm)
  • 1 large onion, diced
  • 2 cloves garlic, chopped
  • 1 tsp chipotle chili powder (add more if you like it spicy!)
  • 1/2 tbsp chili powder (more or less depending on how spicy you like it)
  • 1 tsp ground cumin
  • 1/2 tsp cinnamon
  • 1 cup diced can tomatoes
  • 3 apples, peeled and diced
  • 2 tsp chicken broth powder and 1 cup water or 1 cup chicken broth or stock
  • 2 medium sweet potatoes, peeled and diced into 1 inch/ 2cm chunks
  • 1/2 red pepper, diced (I use jarred roasted red peppers but you can use fresh)
  • 1 19 oz/540ml can of red kidney beans
  • 3 tbsp chopped cilantro

Ingredients:
  1. Heat a large saucepan over medium high heat with the vegetable oil drizzled in the pot.
  2. Brown the pork and toss in the onions, cooking until soft.
  3. Add the garlic, chipotle, chili, cumin and cinnamon, heat for 30 seconds.
  4. Add in the tomatoes, apples and chicken broth.  Stir and reduce heat to medium low.
  5. Simmer for 1 hour until the meat is tender.
  6. Add in the sweet potatoes, red pepper and kidney beans. Increase heat to medium
  7. Stir, bring back to a boil, reduce heat, cover and simmer for 25 minutes.
  8. Stir in the cilantro and serve.

Enjoy!

Tuesday, October 30, 2012

Coq au Vin

Holy moly I whipped up some lovely Coq au Vin this weekend.  Quite a while ago I made this dish in my crock pot and I was totally disappointed.  And I had to take the dish to a potluck.  I wasn't very 'gourmet goddessy' that day!  This version redeems me.  I had to refrain from licking the dish.  (I was having leftovers at work)

Be sure to use a red wine that you would drink.  Something light and fruity goes well here.

Coq au Vin
Serves 4 - 6

Ingredients:
  • 2 Tbsp each, butter and olive Oil
  • 2 slices of bacon, diced
  • 5 chicken thighs and 2 breasts, bone in and skin on is best.  I remove any fat clumps I find just to lighten it up a bit.
  • 1 large onion, diced
  • 2 - 3 cups chopped cremini mushrooms
  • 1 large clove of garlic, chopped
  • 1 tbsp fresh thyme or 1 tsp dried
  • 1/2 tbsp fresh sage or 1/2 tsp dried
  • 1/4 tbsp fresh rosemary or 1/4 tsp dried
  • 3 tbsp flour
  • 2 cups red wine
  • 1 1/2 cups chicken broth
  • 1 tbsp tomato paste

Instructions:
  1. Heat the butter and oil over medium high heat in an ovenproof shallow saucepan with a lid or dutch oven.
  2. Add the bacon and saute until crispy. Remove from pan and set aside
  3. Place the chicken in the pan and cook until brown on all sides. Remove from pan and set aside.
  4. Add the onions to the pan and cook until softened and lightly brown.
  5. Toss in the mushrooms and garlic, cook for 2 minutes.
  6. Stir in the thyme, sage and rosemary and cook for 30 seconds
  7. Add the flour and whisk until fully mixed in
  8. Slowly pour in the wine, whisking to blend it with the flour mixture
  9. Stir in the chicken broth and tomato paste.
  10. Place the chicken and bacon back in the pan
  11. Cover the pan and place in oven.
  12. Bake (actually you are braising at this point) for 1 1/2 to 2 hours until the chicken starts falling apart. Serve with potatoes and something green like brussel sprouts or steamed broccoli. 

Thursday, October 11, 2012

Thai Coconut Shrimp Soup

I whipped this up the other night.  I LOVE leftover soup for lunch and it needs to be interesting, tantalizing, and full of flavour because I work around some of the best restaurants here in Halifax.  The temptation to go out for lunch is full on most days. But this soup could go up against the best out there. 


Thai Coconut Shrimp Soup still in the pot!
Thai Coconut Shrimp Soup
Serves 4 -6

Ingredients:
  • 1 tbsp veg oil
  • 2 ribs celery, diced
  • 1 medium onion, diced
  • 1 1/2 tbsp chopped garlic
  • 2 tsp grated ginger
  • 1 tsp ground coriander
  • 3 cups seafood or veggie broth (you can make your own seafood broth by taking the shrimp shells and boiling them for 15-20 minutes, drain and there you go - seafood broth!)
  • 14oz can coconut milk
  • 1 tbsp brown sugar
  • 2 tsp fish sauce
  • 2 tsp red curry paste
  • 1 tbsp tomato paste
  • 1 tsp garlic chili sauce
  • 1/2 roasted red pepper chopped
  • 2 cups edamame (without the shells)
  • 3 cups chopped green onions
  • 3/4 lb shrimp, shelled and deveined
  • 2 tbsp fresh cilantro
  • 2 tbsp lime juice

Instructions:
  1. In a large saucepan heat the oil over medium high heat
  2. Saute the celery and onions until soft, about 5 minutes
  3. Add the garlic, ginger and coriander and saute for 30 seconds until fragrant
  4. Pour in the seafood broth and the next 6 ingredients through to the garlic chili sauce. 
  5. Heat until simmering. 
  6. Toss in the red pepper, edamame, green onions, and shrimp.
  7. Simmer until the shrimp are opaque.
  8. Stir in the cilantro and lime juice.

Enjoy!

Wednesday, September 12, 2012

Nicoise Inspired Lunch

Welcome to back to school season.  I know it can be tough, getting back into the routine but we all have to do it.  For me, September is about renewal.  It's the start of the year for me, time to establish new habits.  While I haven't been writing much about food I sure have been thinking about it, the eating more so than the cooking.  I totally get why people don't feel like cooking at the end of the day.  So here's a big hint - when you do cook make lots for leftovers, freeze what you can or take the rest as lunches.  Let me tell you about a salad I take for lunch pretty regularly these days.

This creation is inspired by the French Nicoise salad and is a great way to use the leftover veggies we see at the market this time of year. 

Nicoise Salad:
Ingredients:
Any of the following or whatever else interests you at your local market these days
  • a couple of boiled, bbq'ed or roasted potatoes
  • handful of green beans, cooked or raw depending on how you like them
  • cucumber
  • tomato
  • peppers
  • olives
  • hard boiled egg, peeled and cut in quarters
  • tuna, leftover chicken or shrimp
  • beets, pickled or roasted cut in quarters.

  • Balsamic, Italian or Sweet Onion vinaigrette
Instructions:
  1. Place each item in it's own section on your plate or lunch container.  Yes, they can touch but you don't toss them together (but you could really, I won't be by to check...)
  2. Place the dressing in a separate container and drizzle it over everything just before you eat.

That's it.  It's that simple.  Great way to use leftovers! 

Tuesday, August 28, 2012

Chicken and Peaches

This may be the simplest main dish ever made.  Seriously - 6 ingredients and you have the most lovely dish.  I love to cook with peaches when they are in season and currently they are in season!  YUMMMM

Chicken and Peaches Served with Roasted Potatoes
Serves 2

Ingredients:
  • 2 chicken breast halves with the bone (more flavour and less chance of drying out on the BBQ!)
  • Cooking Spray
  • 1 onion, diced
  • 6 peaches, peeled, pitted and sliced
  • 2 tbsp soy sauce
  • 4 tbsp bbq sauce + extra to baste the chicken, I use one for chicken and ribs but you could use your favorite.

Instructions:
  1. Preheat BBQ to high
  2. Preheat a sauce pan to medium high and spray with cooking spray
  3. BBQ the chicken on the BBQ for 30 -35 minutes, depending on how thick the breasts are.  (you can also roast some nice potato wedges at the same time!)
  4. In the sauce pan toss the onions and cook until browned
  5. Reduce the heat on the pan to medium and add the peaches
  6. Cook until softened, about 5 minutes
  7. Add the soya sauce and bbq sasuce and simmer on low for another 10 minutes
  8. Add water by the tablespoon if the sauce is too thick for your liking
  9. Baste the chicken with the extra bbq sauce during the last 5 minutes of cooking time
  10. Serve the peach mixture over the chicken.  And the potatoes if you roasted some.
With the soy sauce and bbq sauce there is plenty of salt in this dish so don't add any unless you really need it at the table.

Enjoy!


Thursday, August 23, 2012

It's summer time and the livin is easy.

Truer words were never spoken.  Lately I've been grilling some meat or fish and serving it along side some farm fresh steamed veggies usually tossed with butter or maybe a salad from the lettuce and tomatoes out of my garden.  There really is only one appropriate summer cooking method - KISS - Keep it Simple Silly! 

I finally found some soba noodles at the grocery store recently so I thought I'd make some of those wonderful snow peas into a Japanese inspired stir-fry.  And the leftovers for lunch would be awesome.  I toasted up some sesame seeds in a dry wok first and removed them from the pan.  I made a sauce out of hoisin, soy, chili sauce, brown sugar, rice vinegar, garlic, ginger and water. I was psyched. 

I set a pot of water on to boil the noodles.  I figured I'd cook the whole package since it indicated it was for 4 people and I wanted leftovers for lunches.  Once the water was at a rolling boil I snipped the top off the package and dumped the noodles in the pot.

Anyone see what's coming?

Yeah soba noodles come tied up in bundles with a thin paper wrap around each one. These paper wraps were now keeping my noodles together in an nice organized fashion as they twirled around in the pot.  I said a few swear words, grabbed my tongs and started grabbing bundles of noodles out of the pot.  Not only were the noodles starting to soften but they were also friggin hot.  I managed to get the paper wraps off but not before the noodles started to stick together forming noodles gluepy noodle masses.  Back into the water they went and I called for back up. 

Mom tried to seperate the gluepy masses while the noodles finished cooking in the pot.  Never to throw food away, I finally said "enough" and I pulled the looser ones out of the pot and tossed them in the stir-fry. 

I currently have a container full of glumpy noodles sitting in my fridge.  I intend to freeze them and use them later in a soup.  I figure they'll work well there. Waste not, want not!  And now I'll go back to simple grilled meats and fish with sides of farm fresh steamed veggies for what's left of our summer.

Thursday, July 12, 2012

The realities of a working girl

I just violated one of my golden rules.  I heated up my lunch in a plastic container.  Do you know how many chemicals are released when you heat plastic?! And who in the hell eats soup in July?!  Well I like to keep the office on the cool side so.... Yesterday I went over to Pete's Frootique for a nice bowl of soup cause I was cold at lunchtime.  I had already eaten my leftover slice of pizza and little salad so when they gave me a roll with my soup I thought "now what am I going to do with this?".  So last night I grabbed a soup out of the freezer (Lentil soup from October 2011 - hope I blogged the recipe cause it's quite tasty and I'd love to make it again.) to go with my roll for today's lunch.  I couldn't throw out a perfectly good roll...  although now that I took the roll out of the plastic bag it was in I'm realizing it's got little mold spots on it.  yup, it's stall.  Seriously?  For what Pete's charges for a bowl of soup the rolls should be fresh daily!  I'd take it back but that would entail going outside and it's way to nice to tempt myself by going outside.  No way would I come back to the office.

That's right I'm working full time  - again.  Gone are my mornings on the couch flipping through cookbooks planning the evening meal.  I've got a piece of salmon taken out for dinner.  I've also got some Swiss Chard I picked out of my garden on the weekend to go with it.  Actually that sounds pretty good.  I was going to go on about how my eating habits have changed from gourmet'esgue to quick and more that occasionally, processed.  I'm reheating in plastic and eating prepared foods. Reality bites.  Except for tonight.  Tonight sounds pretty good and I know I have white wine in the fridge ready to go with it.

Now I primarily cook on the weekend, planning meals I can add to my freezer collection and/or things that can translate into sandwiches or salads for the week.  Eggs for dinner rock it (super quick, super easy) and whenever there is a sale on my favorite frozen pizzas I stock up (dinner and lunch the next day).  Last evening I was checking out the lettuce in my garden and all I could think was "oh man picking that and getting it ready to eat would be too damn much work".  See I do know what it's like to be a busy/lazy working person.  I know at the end of the day you don't want to cook (or pick and clean lettuce).  This is why I harp about being organized.  At least I was able to pull out a nice homemade soup from my freezer last night.  Even if I now have to go around and try and scrounge up a roll or some crackers would do.... Glad I had a boiled egg for morning snack (don't judge me, it's a long time between breakfast and lunch).  At least Pete's give you a big napkin with your purchase.  It's lasted me 2 days so all is not lost.

Monday, June 18, 2012

Russia - Shashlyk

Sounds fancy doesn't it.  Well Shashlyk is simply kebabs, marinated for at least 6 hours but overnight it better.  The research I've done has shown the marinade to be pretty simple.  The most important part is to grate the onion instead of chopping it.  Seems this is standard procedure for most eastern European cooking and really releases the onion flavour (I think this will become my new standard for marinades and sauces!) 

The rest of the Euro 2012 menu is here.

Russia - Shashlyk
Serves 4

Ingredients:
  • 1 lb beef or pork
  • 2 onions
  • 2 cloves garlic
  • 1/2 cup red wine
  • 1/2 cup red wine vinegar
  • 1/4 cup lemon juice
  • 2 tsp paprika
  • 1 bay leaves
  • 2 tbsp olive oil
  • salt and pepper

Instructions:
  1. Cube the beef into 1 inch/2 cm cubes
  2. Dice 1 onion into 1 inch/2 cm cubes
  3. Grate the remaining onion and garlic, place in a shallow dish
  4. Add remaining ingredients to the dish and mix well
  5. Toss in the meat and onion cubes
  6. Marinate overnight covered in the fridge.
  7. Heat the bbq, grill or grill pan to high heat.
  8. Place the meat and onion cubes on skewers, alternating meat and onion
  9. Grill the skewers on all sides until seared and browned.
  10. Serve with steamed root vegetables like turnip and carrots and some pickled veggies like pickled beets.

I enjoyed mine with steamed turnip, pickled beets and some bottle bbq sauce on the side.